
Minding your own beeswax
It is the end of January, about the most boring time of the year for a beekeeper. There are no bees flying around the hives, no spring flowers, and it is too early to order more bees.
The new beekeeping catalogs have not even arrived in the mail yet!

Right: Uncapping the Honeycomb. The hot electric knife melts the comb and sizzles as it slices its way through the wax.
Suddenly you remember that bucket full of wax cappings, from the fall honey extraction, sitting in your basement । AHHH a bee project at last!
Beeswax was being used by people more than 5,000 years ago. The ancient Egyptians used wax for embalming and making waxen figures.
The Romans used wax tablets to write private messages on. The message, once read, could easily be smoothed out and erased by running your fingers over the message etched into the soft wax.
In the fourteenth century having beeswax candles was a sign of nobility. Beeswax candles burned more cleanly, burned longer, and smelled much better than the cheaper candles made from mutton fat.
That is actually one of the things that hooked me on beekeeping when I was in my teens. No not nutten fat…. It was that sweet, sweet smell of beeswax. There is only one thing better….. That’s the sweet smell of melted beeswax and hot honey on extracting day.

Left: Frames of honey comb sits in the uncapping tank. Wax cappings can be seen at the bottom of the tank. The screen at the bottom of the tank allows honey to drain off the cappings and into a holding tank.
I use the beeswax produced by our bees for candles, lip balm, and hand cream. But before the beeswax can be used for these items it must be cleaned. How do you clean beeswax…. Well I tell you my secrets.
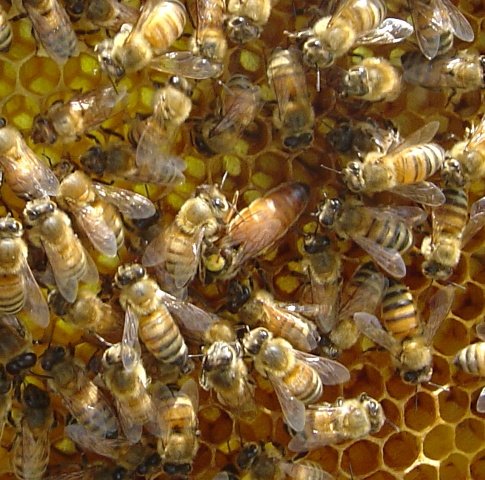
You may not know that beeswax is produced by glands located on the underside of the worker bees. These glands become active when the young bees reach a certain age. It takes a lot of energy (food) to produce wax, and some colonies are much better at producing it and building comb than others. The wax that the bees produce is the construction material of the hive. Wax is molded by the bees to create the comb that is used to raise young bees and store the pollen and honey they use as food during the winter months. It is interesting to note that although wax production and comb building is the work of younger bees, If by chance something were to kill off all the younger bees, the older bees would suddenly become able to produce wax again.
So how do we get the wax from the bees?......
We take it of course.

Right: Melting the wax cappings in an old pot containing water.
Bees are avid builders. They will build comb everywhere. Where you want it, and many times where you don’t. The hives we use are designed to encourage the bees to building comb were the beekeeper wants it..... In the frames of the hive.
We start with a sheet of wax in the frames as a starting point for the bees. The bees will then produce wax and build out the frame by building the comb. Bees will also produce comb between boxes and on top of frames. This wax is removed from the hive during inspections. Some of the wax we use is collected in this manner.
Some of the comb is used by the bees to store honey, hopefully a lot of honey, although some years not enough. When the honey is "ripe" the bees will “cap” it with a layer of very white wax. This layer of wax protects the honey from absorbing moisture from the air, and thus preserves the honey until it is needed by the bees.
In a good year the bees will produce an abundance of this honeycomb allowing the beekeeper to “steal” some of it for his own personal use. We can’t take all of it, even though we want to, because the bees need to keep about 50 pounds for themselves in order to survive a typical New England winter.
In a good year the bees will produce about 60 pounds of surplus honey per hive. I have had hives produce up to 90 to 100 pounds of surplus honey.

Left: Dibris left on the cheese cloth after the melted wax and water is poured into the disposable container.
The frames of honeycomb are removed from the hive and taken to the extracting room to have the honey removed. This process includes using a hot electric knife to cut off the white cappings exposing the liquid honey. The frame can then be put into an extractor (basically a large centrifuge) and the honey is spun out of the frames.
At the end of the process you end up with frames containing empty comb, liquid honey, and the beeswax cappings. The empty comb will be placed back in the hives the following season allowing the bees to just refill them without having to rebuild them.

Right: Clean wax floats to the surface while the water and dibris settles to the bottom of the container. This process must be completed three times to clean the wax enough for use.
The wax cappings along with all the burr comb can then be processed into usable wax. There are probably many ways to clean and render the wax. This is just my method.
Remember that wax is flammable and care must be taken when heating it!
I use an electric heating element to melt our wax. I always mix water with my wax when melting it down. This insures that it will not over heat and burst into flames. The water also helps “clean” the wax. Once melted I pour the wax and water through two layers of cheese cloth into a disposable container. The wax and water is allowed to cool. Once cool the container can be cut open releasing the dirty water and the solid wax. The wax will have many impurities left in it, and this process is repeated two additional times before it is clean enough to use.

Left: The reward for all the hard work. Sweet smelling clean bees wax ready for use in candles and balms.
It is a lot of work!
But the sweet yellow beeswax reward is well worth it!