

Generally, on Cape Cod, at this time of year, a colony will have built itself up to about 30,000 or 40,000 bees. Over the next month they will continue to increase in numbers to about 60,000. As the bees start to get crowded they start thinking about swarming.

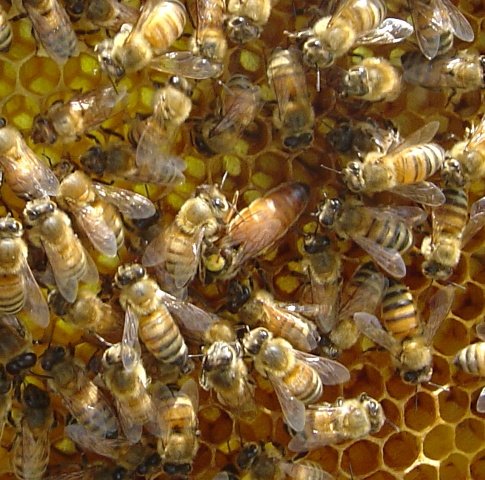
Above: Queen cup frame just pulled from my cell starter hive.
After 36 hours the bees have started building queen cells.
You can tell the accepted cells by the wax that has been added to the cell.
24 cells have been accepted out of 28 grafted cells
It is always easier to work with the bees rather than against them.

Above: Close up of the started cells
Here’s what I have been doing.
Step one.
Create a cell starter hive. Take a strong colony and locate the queen. Place her and the frame she is on aside. Now take all the frames that have open larva and shake the bees into a 5 frame nuc (at least 5 frames worth of nurse bees). What you are doing is shaking nurse bees into this nuc since they would be found on the frames with open larva. There can be no queen or they will reject the cells you put in the nuc later. That is why we located her and put her aside. To this nuc add one frame of pollen, one frame of nectar, and a wet sponge. The bottom of the nuc should be screened so the bees will not over heat. The entrance must be closed so the bees cannot return to their original colony. Put the cover on the nuc for now.

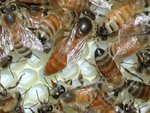
Above: A well fed queen cell which is 36 hours old
You can see how the larva has grown in a day and a half!
Step Two
Choose the hive (queen mother) you plan to raise queens from. You will need her eggs! Of course you will select the strongest, best behaved, active, honey collecting colony you have to pick from. Locate the queen and put her aside. Also locate a frame of eggs and young larva (newly hatched) and brush all the bees off of it back into the colony you are taking it from. If you shake the frame you will also move the larva from the center of the cell it is in.
Step Three
Graft newly hatched larva, 3 days old, into primed plastic queen cell cups. I prime the cells with royal jelly I saved (froze) from the previous year. You will also have success if you prime the cells with a mixture of 50% plain yogurt and 50% water. Just a small drop in the center of each plastic cell will help you float the larva off the grafting tool. The larva should look like a comma. If it looks like a full C shape the larva is too old. Use the youngest larva you can find. Use a damp hand towel to cover the grafted cells so they do not dry out. Graft two bars of 14 cells each, that will be 28 cells all together.
Step Four
Place the queen cup frame into the cell starter hive you created earlier. Place the grafts between the two frames, pollen frame to one side, open nectar frame to the other. Now leave them alone for 24 to 48 hours. Place the frame of larva you took the grafts from, back into the hive you stole it from.

Above: Same cell with wax removed. See all the white
royal jelley in the cell? I will harvest this and freeze it
for use next queen season
Step 5
Prepare a queen right cell builder hive. Open the hive and find the queen. Place her in the bottom hive super with all the empty and capped frames of brood. Place a queen excluder over the box with the queen and put all the open larva, pollen, and nectar in the box. Leave an open space between open larva and a frame of pollen to place your started cells. Leave this colony over night while your cells are in the cell starter hive. This will allow time for all the nurse bees in that colony to move to the upper box. It will be 3 days before any eggs the queen lays in the lower box to hatch and require nurse bees.
Step 6
After 24 to 48 hours open the cell starter hive and remove your grafts. You will be able to tell which cells have been accepted by the bees by the work they have started on the cell. Excepted cells will have wax being added to them. This year the bees started 24 cells out of 28 grafts. Not bad. Take the queen cell frame and place it into the cell builder hive you prepared the day before. This hive will feed and build the cells.

Above: Just a side note. I was pleased with the very
large crop of peas we produced in the garden this year.
Thanks polinators!
Wait and count. It takes 16 days for a queen bee to be created. Remember that the larva you grafted is already 3 or 4 days old. The queens will hatch at 16 days old, only twelve days after you graft them. Before that happens you will need to move the individual cells into queen-less mating nucs, or a queen-banking hive.
More on that next time.......


No comments:
Post a Comment