Showing posts with label Varroa Mite. Show all posts

March 15, 2011

Middle Of March

It’s the middle of March and the snow drops are just starting to pop open here on Cape Cod.  Spring is just around the corner!

After enduring a long cold winter, mice, mites, small hive beetles, starvation, falling trees, and poor food stores, the bees are just now beginning to emerge from their winter cluster.


:Left:  Small Hive Beetle, dead on the sticky board.

          In March?  Realy?


The queen should have started raising young by now, and the new bees will be taking fights for the first time. How many of them emerge fly a little too far from the hive and become too chilled to make it back home?
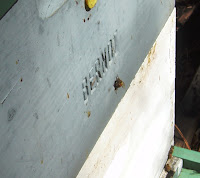

Right:  Bees were finally able to take flight during warmer days here and there over the past couple of weeks.


We lost 50 percent of our hives to this long winter. We did not receive our January thaw as we do most years. Temperatures remained in the 30's for six weeks or more.  But then, I don't have to tell most of you that!

Of the remaining hives two are very weak. The Kona queens I introduced last year seam to be longing to return to the warm Hawaiian weather they came from.

They did not do well here.

Of course they have done better than the dead hives… That’s it… Look on the bright side!


Left:  My storage shed.... Filled with beekeeping equipment, boxes, frames.....  And mice!


One hive that started the winter with plenty of bees, frames of pollen, and frames full of honey was found dead a couple of weeks ago.

I had given them candy feed towards the end of January.

At that time they were robust…. 7 frames of bees. When I dissected the dead hive I found thousands of dead bees only two inches away from capped honey. There were still 6 frames of capped honey in the hive and three frames full of pollen. Why did they die? During the cold weather they probably just could not shift over to the food stores. What a shame!


Right:  The mice are so bold as to build nests in plain sight!


Sometimes you cannot figure out what went wrong. Is it natural selection? Or just a stupid beekeeper?

But yes…. As beekeepers often do, I spend a lot of my time during the winter thinking and dreaming about the bees. Perhaps answers come during those long months. I do have something up my sleeve… Perhaps I can do something about the weather!

The mice have been taunting me all winter as well. Despite my best attempts at thwarting them I continue to find chewed items around the storage shed. They love the newspaper wrapped wax foundation. An expensive item to snack on.


Right:  Outside temperature 34 degrees....  Inside temperature 60.

Perhaps I've found a way to control the weather!


One family even had the nerve to build a home right in plain sight, as if to dare me to try to do something about it!

But bright days are ahead! The weather is warming. The days are getting longer. The first flowers are poking there sleepy heads above the ground. The bees are starting to fly…

Yes the bees are starting to fly!

October 3, 2010

Board Bees Bad Bees

Well it is already October and the beekeeping season for 2010 is over.


Left:  Honey on the hives in July                                                    Right:  Same colony at the end of August

And I for one am glad to see it go.

A very early spring brought a very early end to the honey flow, which lengthened the amount of time that there was a lack of nectar and pollen this summer. It does not make a beekeeper happy to see his large, ready to collect hives, sitting with nothing to do.

Our nectar flow here on Cape Cod starts towards the end of June and ends the first week of August.

This year however it started two to three weeks early, and ended two to three weeks early. This resulted in a longer period of time between the spring and fall flows, (almost two months).

Left:  A colony started in spring never moved up into the upper hive body.  This colony has not produced enough stores to survive the winter.


This combined with late and poor goldenrod nectar flow resulted in starvation conditions for our hives. Hives with 50 to 60 pounds of honey on the hives in July were starving by the end of August.

Of course I am partly to blame for this. We had such good success building up colonies in the spring that there were many more mouths to feed when the nectar flow stopped early.

We have been feeding our hives sugar syrup and pollen substitute since the third week in August. Although the bees are doing well now, and there are plenty of stores in the hives because of the feedings, the additional sugar syrup and the length of time of the feeding has created other problems. namely, a large increase in the small hive beetle population in the hives. I haven't even mentioned the Varroa Mites!


Right:  Small hive beetle larva crawling out of the hives onto the bottom boards.  The feeding of sugar syrup for such an extended period caused an explosion in small hive beetle.  Varroa Mites can be seen on the bottom board as well.


Additionally our five new colonies never moved up into the upper hive bodies. Frames and new foundation were never drawn out or filled with stores for winter. This forced us to combine these weak colonies in order to ensure their survival. The queens of the weaker colonies were killed and their colonies were combined with other weak colonies.


Left:  Colony being prepaired for winter.  Crisco oil and sugar patty to fight Tracheal Mites, Pollen patty to provide polen when none is being collected, Menthal oil towel to fight Tracheal Mites, Small hive beetle trap, Apastan strips to fight Varroa Mites.  Sugar syrup is being fed with a division board feeder in a different hive body.


So, now that the hives are well fed, and in good shape to survive the cold, damp, cape cod winter, it is time to reflect on this past beekeeping season.

Hmmm… What would I, could I, have done different…… right now I just don’t know!

But I will have plenty of time to think about it over the next few months.

April 12, 2010

Do you really want to do this?

Last week I wrote about finding queen cells in one of my hives. April on Cape Cod is just too early for a hive to raise or replace a queen. The weather is unpredictable, the temperatures are low, and the few drones (males) around are probably not mature enough for mating.


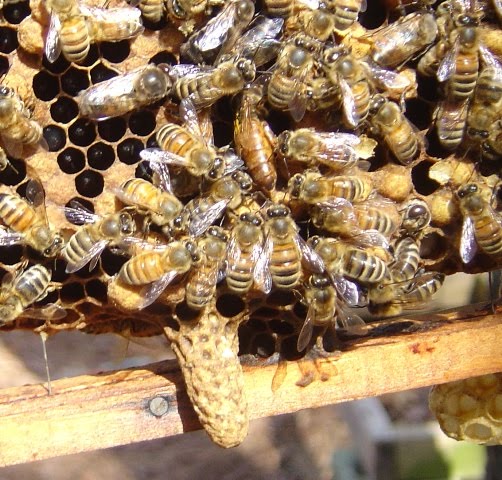
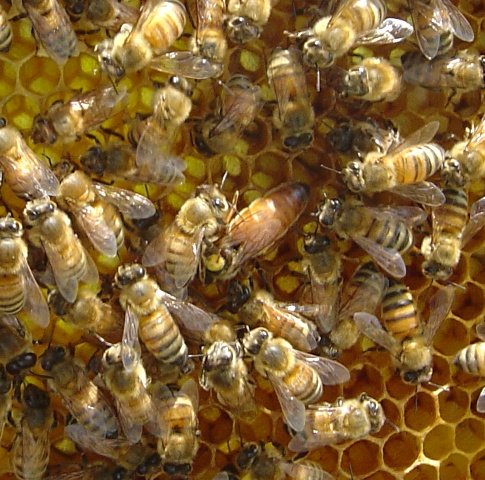
Right:  Queen cell being produced by a hive that probably has a queen that is starting to fail.  If you look closely you can see capped worker brood and capped drone brood.  Can you find the queen?  She is there.


This hive’s desire to raise another queen could be for only one of two reasons.


Left:  A close up of the queen cell.  You can see the old queen just  above and to the right of the cell.  Around her are circled her attendant workers.  Perhaps the workers are guarding the new queen cell to keep it from being destroyed by the queen.  Or perhaps the queen knows she is being dethroned and is allowing it to happen!


Either they have been overcrowded and feel the need to reproduce (swarm), or the existing queen is failing and the bees have decided to replace her.
The weather was just good enough on Sunday (62 degrees) to make a hive inspection.


Guess what I found?

Sure enough the bees had built two more queen cells. I said "Do you really want to do this now?"


Right.  A queen larva, from one of the destroyed queen cells.


I found the old queen. She has been laying eggs, but upon closer examination I discovered that about 5% of the brood was drone brood scattered among the worker brood.

This is one of the signs that the queen may be failing.

A drone, (male bee), is produced from an unfertilized egg. Since queens only mate once in their life, (with up to 30 males), they store the semen within their bodies. When the queen starts to run out of semen she will lay more unfertilized eggs, which become males. Drones are larger than workers so their cells stick out beyond the surface of the comb.


Right:  One of my home made small hive beetle traps which is installed under the screened bottom board.  You can see all the dibris.  No mites and no small hive beetle.  There are beetles in the trap, but they are sap beetles.


This queen was introduced into this hive in 2007. That makes her three years old, going into her fourth season. I should have replaced her last fall, but she has been such a spectacular queen. She has out produced all my other hives. I have been using her eggs to produce other queens. I was hoping to stretch her through this last season.


Left:  Closeup of the trap and beetles.  The trap is baited with a mixture of mineral oil and cider vinegar.  I have had alot of sucess catching small hive beetles with this.


Since it takes 16 days to produce a queen from a fertilized egg, killing the queen cells has bought two weeks time. That is, as long as I did not miss one.


Right:  A closeup of the sap beetle.  They must be attacted to the cider vinegar.  These beetles are not a hive pest like the small hive beetle.


This season has defiantly gotten off to an interesting start.

April 4, 2010

Isn't a little early for that?

This weekend on Cape Cod was beautiful. Temperatures reached just above 70. This gave me the opportunity to get into some of the hives for a quick check.

Right:  A strong hive for the first week of April.  With 7 frames of bees, emerging brood, eggs, and larva, this hive needs more room.


Sure enough all the hives I checked had capped brood, eggs, and larva. Their strength ranged in size from three frames of bees up to eight.

One of my hives has been flying very strongly the past week or so. Something told me that I should look at them! I opened up the hive. I found eggs, larva, capped brood, and the queen! I also found two queen cells! I thought to myself… Isn’t it a little early for that?


Left:  One of the two queen cells found in this colony.  The queen was found with plenty of eggs.  She is getting old, going into her fourth season.  Are they trying to replace her, or are the planning to swarm?  Time will tell.


This particular hive had a bad infestation of mites last fall. This particular hive of bees has had a bad case of mites for the past three years. Each fall I have had to treat them, and each spring they surprise me on how great they come through the winter.

This particular queen is three years old. She was purchase from a breeder from Vermont. She has outperformed most of the other queens in my apiary year after year. There was plenty of worker brood, larva, and eggs. I find it hard to believe they would be replacing her. Perhaps the bees felt congested, with the brood trapped between frames of capped honey (from last year) and new pollen.

I destroyed the queen cells and moved some empty comb near the brood. This should allow the queen more room to lay. I also place an empty brood chamber above them.


Right:  A closeup of one of the two queen cells.


An inspection next week will tell if they are happy with the changes, or if there mind is made up to swarm!

Or perhaps this is just an early sign of a great honey season, or lots of swarms!

March 8, 2010

If I knew then what I know now

This blog post will be an examination of my queen rearing attempts over the past three years with conclusions regarding correct and or incorrect processes.

My queen rearing project began out of a desire to see my bees survive the damp cape cod winters. I had been experiencing a 50% to 80% loss of colonies from year to year.

Left:  Example of bee larva of various ages.


I along with many beekeepers have noticed that over the past 30 years it has been harder and harder to keep bees. I have seen winter hive looses, not to mention summer hive losses, increase year after year.

I remember when I was 17 years old with my first hive of bees. They were Starline hybrid bees, and I knew next to nothing about keeping them. The hive survived for years on its own. Now that would seldom if ever happen. A hive that is not carefully kept and attended to will probably die the first season. Trachea, and Verroa mites along with the small hive beetle, as well new bee viruses, not to mention colony collapse disorder have devastated the bee population.

Right:  Queen Pupa of the development age from different size queen cells.  These queens were grafted on the same day.  Their developmental variation is probably due to the age of the larva at the time they were grafted.


In breeding and mass production of queens have weakened the genetic quality of our bees. Queens that would once last four or five years need to be replaced every two.


 Left:  A steady hand is needed to transfer the fragile larva from the comb into the artifical cell


 So what have I done about it? Well three years ago I started learning how to raise queens of my own. With both success and failure.

2007 (year 1). I experimented with two methods of queen rearing. The miller method, and the Doolittle method. I quickly became apparent to me that the Doolittle method allowed me much more control over the queen rearing process.

Right:  Larva after being grafted.  These larva should be only three days old.  Their various ages can bee seen by the degree of curviture of the larva.  Three day old larve look like a comma.  Some of these grafts appear to be 4 or 5 days old.  This would result in poor quality queens.


Positive

I learned how to graft (I was dry grafting at the time) larva into artificial cells.

I learned how to create a cell starter colony

I learned how to create a cell builder colony

I learned how to create queen mating nucs.

I was able to have 10% of my grafts accepted by the cell builder colony (9 out of 90 grafts)

Good size queen cells were created by the cell builder colony

I had 8 queens emerge

Queens were of adequate size.

I had 3 queens mate and start laying

 
Left:  Two days after grafting and being placed in a cell builder, you can see the larva floating in a pool of royal jelly.  You can also see how the nurse bees have started to add wax to the plastic cell as they start creating the queen cell.


Negative

Only 10% of my grafts were accepted

No queens survived into 2008


2008 (year2). I continued to experiment with the Doolittle method of queen rearing. I started to learn more about bee genetics and the importance of the Drone (male). I took a queen rearing class and discovered that if the artificial cells were primed with royal jelly, or even plain yogurt, better grafting results could be obtained.

Left:  My first queen cells from 2007.  You can see how large they are.  This is due to the proper age larve being grafted into the cell, and the fact that only 8 cells were accepted and fed by the nurse bees.  The cell builder colony was not over whelmed by the number of queen cells.


Positive

I raised queens three times that spring.

Wet grafting of larvae improved my acceptance rate to 90%

Grafting 90 cells yielded 80 queen cells.

I raised 15 mated queens that season.


Negative

Queen cell size was very small. This was partly due to my over whelming my cell builder hives with too many queen cells. I believe that I also grafted larva that was 4 or 5 days old not 3 as I should have. This resulted in smaller cells and smaller queens.

I had a problem creating nucs. I was not as organized as I should have been. I attempted to make splits from nearby colonies. 50% of the nucs created returned home to the mother hives abandoning the queen cells and brood placed in the nuc. The previous year I had used relocated bees to create the nucs. That method worked much better.

Right:  Queen cells from 2008.  You can see how small the cells are.  This was probably due to the number of grafts placed in the cell builder and the age of the grafted larva being too old.


I had problems with small hive beetle larva infesting two of the nucs creating a situation where the bees abandoned the nuc. This was probably due to the low numbers of bees remaining in the nucs thus creating stress within the nuc colony.

Queen quality was poor due to the small cell size. I did not attempt to over winter any of the queens.


2009 (year 3). I continued with the Doolittle method of queen rearing. It was an extremely cold wet spring. The colonies would not buildup and missed the main honey flow (May, June, and July). All the colonies were starving in August, a time where there should have been 60 pounds of surplus honey on each hive. Since there was no promise of honey that season two of the colonies were used for queen rearing.


Left:  Grafts from 2009.  Better cell size, but still too small.


Positive

I continued having great success with grafting and acceptance of the grafts. This improved to a 95% acceptance rate.

I learned how to create and use, with success, a queen right cell builder colony.

Grafted three cycles of queen cells over a two month period.

Raised 25 queens.

Learned how to bank queens.

One queen was overwintered and has survived.

 
Right:  More small queen cells


Negative:

Queen cells were small again. It became apparent that I was grafting larva that was too old. During one cycle, queens emerged two days before the expected age of 16 days old destroying 19 queen cells.

I had the same problems with creating mating nucs. Many queens were lost because the workers returned to the mother colonies.

I became allergic to bee stings


2010 (year 4). We will see, won’t we!


January 16, 2010

Candy for the Bees

It is mid January here on Cape Cod, and we have had our first thaw day of the winter. Today’s temperature managed to climb into the 40’s. That meant that it was warm enough for the bees to take their all important cleansing flights. You see bees cluster at temperatures below 40 degrees.
.

.
Left: Making Bee Candy. All ingredients mixed in the pot on top of the stove.
.
.
.
.
.
.
That means they group together in a tight ball. By moving their wing muscles without moving their wings they generate heat to keep the inside of the cluster of bees between 80 and 90 degrees. The bees will remain in this cluster and slowly move around the hive in order to access the stores of honey which is their food.

.
.

Right: Heating the mixture to 245 degrees F.
Remember to hold it at this temperiture for 3
minutes.
.
.
.
.
.
.
If temperatures remain too low for too long a period of time then the bees can run out of food and starve to death only inches away from stored honey. To help them survive conditions where they cannot relocate to other areas containing food, beekeepers will often place candy above the bee cluster. This provides them with additional food stores in the event they run out of honey where they are clustered.
.


.
Left: Mixing the Candy in cool water. It is ready to pour out when it cools to 200 degrees F.
.
.
.
.
.
.
When temperatures manage to increase above 40 degrees the bees can break cluster and move around freely. They will take cleansing flights to rid themselves of the waste that they have been “holding in” all winter. Glad I’m not a bee!
.
.

Right: Harden candy in the cookie sheet
.
.
.
.
.
.

Since the temperature was above 40 degrees today I decided to open up the hives and check the status of the bee candy I had installed in the hives in late November. In fact, each of the hives had eaten all the bee candy in a four to five inch diameter area around the cluster.
.
.


Right: Hive being prepared for winter. Notice pest strips between the frames which need to be removed before winter. Additional items seen include menthal oil paper towels used for tracheal mite treatement, and sugar grease patty used for varroa mite treatement. After the pest strips are removed this hive will be ready for winter candy feed.
.
.
I installed additional candy as required in each of the hives.

Since it was warm enough, and I was disturbing the cluster of bees, they started their cleansing flights.

By the time I was done installing the bee candy I had brown drops of bee droppings all over me. Such are the hazards of beekeeping.


Here is my recipe for bee candy:

Ingredients:
5 lbs granulated cane sugar, 1 pint corn syrup, 1 & 1/3 cups water

Equipment:
Candy Thermometer, Cookie Sheet, Four oven mitts, Mixer, Sink with cold water

Directions:
1. Line the cookie sheet with wax paper and set aside on two oven mitts. Make sure the cookie sheet is level.

2. Take all ingredients and place in a pot. Mix until all ingredients are moist. Place on medium high heat. Place the candy thermometer on the side of the pot.

3. Heat the mixture until the temperature on the candy thermometer reads 245 degrees. Hold the mixture at that temperature for 3 minutes.

4. Turn off heat and immediately place the pot into the cool water (using the other two oven mitts). Use the mixer to mix the candy until the temperature drops to 200 degrees.

5. Pour mixture into the cookie sheet and allow the candy to harden and cool. While the candy is still warm make slices to form 8 or more squares.

6. Remove the candy from the cookie sheet and place pieces in the hives above the cluster of bees. Check monthly to see if more candy is needed.

October 31, 2009

Bad Bees

October 2009

Bee season summery.
Well. My last post on this bee blog is almost a year old. A year ago I stated that I would do a better job keeping up with monthly blog posts. I guess not!!
.

.
Left: Beautiful pattern of brood layed by one of my queens.
.
.
.
.
.
.
.
.
The 2009 honey season, here on Cape Cod, was a complete bust. Our nectar flow on the Cape is in the spring. It rained so much this spring that the bees could not take advantage of the abundant nectar that was available. This resulted in very little honey being produced by the bees.
.
.
Left: Larva and Eggs ready to be grafted into plastic queen cups
.
.
.
.
.
.
.
.
.
A hive of bees needs about 50 pounds of honey to survive the winter here on Cape Cod. In an average season the bees will produce about 110 pounds of honey. 60 of that will be taken by the beekeeper, and 50 left for the bees for winter. The honey production was so poor this year that, in August, the bees had no honey in the hives and were in danger of starving. A couple of hives actually had no honey or nectar at all in the hive. Usually at this time there would be at least 60 pounds of extra honey in the hive in addition to the 20 to 30 pounds that would be stored near the brood or young bees.

Never in my 32 years of keeping bees have I ever seen a condition like this. I was forced to feed each hive of bees about a gallon of sugar syrup to sustain them. Fortunately it has been a good fall for the bees and we have been able to feed them substantially. The goldenrod has produced abundant pollen as for them as well. Even today bees were bringing in bright yellow packages of pollen to store for winter.

The verroa mite infestation has been the worst I’ve seen in years. This year I have gone back to treating the hives with chemical strips. The pesticide strips are designed to kill the mites but leave the bees alone. Thousands of mites are dropping out of the hives. Small hive beetle has been an issue as well. Fortunately not as bad as last year where I actually had bees leaving hives because they could not deal with the small hive beetle larva, which looks like groupings of small worms living in the combs.
.
.
Left: Queen larve foating in royal jelly. This larva was grafted into this cell 48 hours earler. The larva is 6 days old
.
.
.
.
.
.
.
.
.
The most disturbing incident however took place in March while I was installing two packages of bees we received from Georgia. Upon shaking the first package into an empty hive, I received a bee sting on my knee. As usual I brushed off my knee thinking that a bee just stung me from the outside of my pants leg. I finished installing the bees in the first hive and then continued to install the second package of bees in the second hive. Then I notice that my hands were burning. I thought to myself “That’s strange I don’t remember using these gloves for chemical or anything that would burn my hands”. I continued picking up and putting away my beekeeping equipment and noticed that my knee where I had been stung was still hurting… A lot. So I lifted up my pant leg and sure enough there was the stinger still in my knee pumping away. I removed it and noticed that one of my contact lenses felt strange. Then I started to itch all over. Sure enough… After keeping bees for 32 years, I now had developed an allergic reaction to the bee sting.
.

.
Left: Queen cells produced as part of my 2009 queen rearing project. This summer I raised 12 mated queens.
.
.
.
.
.
.
.
.
I got to take my first ride in an ambulance!


June 7, 2008

The queens are coming the queens are coming

Well this is my first blog entry of 2008.

It has been a very difficult beekeeping season for me. We started the winter with nine very strong colonies with young queens. By May we were down to four. That’s over a 50% loss of hives. Of those four, one is very weak, two are average, and one is extremely strong.


Left: A dead hive. This hive was lead by one of the queens I raised last summer. Most of the time you can never figure out what happened. This hive stayed in the bottom box and never moved up to the upper box where there was plenty of honey and candy feed. They starved to death inches away from abundant supply
.
.
.
.


That’s beekeeping. Everything was picture perfect in the fall, by spring the story changes.

Of the six queens I raised last year, only two have survived. One survivor was given to a local beekeeper last fall. The other is leading the week colony in our bee yard.


Left: A cell builder hive with two cell cup holding frames installed. These bees do not have a queen, and will quickly turn the grafted cells into queen cells.
.
.
.
.
.
.
.
.
The honey flow is occurring here on Cape Cod, it started about two weeks ago. The bees are quickly storing nectar in the cells, ripening it into honey.

I have been watching my colonies closely for signs of swarming. So far all I have seen are queen cell cups, the cells that queens could be raised in. There have been no attempts by the bees to swarm this year. I have found that if you stay ahead of the bees, and provide them with young queens (introduced in the fall), and plenty of room ahead of schedule, they stay contented in their hives.

I have had no signs of disease or mites in any of the colonies this spring. That’s encouraging. You can see from past blog posts that last year we battled the worst infestation of verroa mites I have ever seen. It is interesting to note that the worst infested hives last year are the strongest this year, even though all the hives were treated.

Right: A frame of young eggs and larva from my strong hive. These young female larva are the offspring from my strongest queen. I want more queens like her.
.
.
.


With swarm season on, we received our first call to collect a wild swarm of bees from the local conservation area. The swarm was hanging off of the corner of a picnic table. You can’t find an easier location than that!. We just put a hive under them, and they dropped right in. This will help make up our winter losses.

Right: Some of the 75 grafted queen cups I made today. They were installed into the cell builder shortly after this picture was taken.
.
.
.


With swarm season on, it is time to try my hand at queen rearing again.
Last week I set up a “Cell Builder” hive. A cell builder is a queenless hive which contains emerging bees, nurse bees, brood, pollen, and nectar. In other words a strong young hive which does not have a queen. Since they do not have a queen, and no young larva to use to raise a queen, they will be primed for my grafts. Grafting is a method of queen rearing where you transfer four day old larva into special cells. These special cells are then built into queen cells by the bees.

Today I inspected all the hives, took young larva from my strong hive, and graft 75 cells cups. These cell cups were then installed into the cell building hive. I’m sure the bees were happy to see the young larva, and have the opportunity to raise some queens.


Left: A closeup of the grafts. You can see the small 4 day old larva floating on a layer of royal jelly.


.


In 24 hours I can look to see how many of the larva they accepted, and decided to grow into queens.


October 30, 2007

Winterize

Well it is the end of October. We have been preparing our hives for winter since the honey crop was removed on September first. I have come to learn that next years beekeeping begins now in the fall. In order to have strong hives next spring the colonies need to be properly prepared in the fall. I will say it again… The success of next years beekeeping depends on what we do now.


.

.

.

.

.

.

.

.

.

Above: A hive top feed being installed on a colony. You can see that a pollen substitute patty, and a Crisco and sugar patty has been installed in the hive. The pollen patty ensures nutrition. The Crisco and sugar patty treats varroa and trachea mites.

Some people are beehavers. They have bees, there bees die, they get more bees, they have them, those bees die.

Some people are beekeepers. They keep there bees healthy year after year.

.
.

.

.

.

.

.

.

.

.

Above: 2:1 sugar syrup being poured into the hive top feeder. The bees will collect this sugar syrup and store it for food to be consumed this winter.

I have been amazed that our mite problem still exists in the previously treated hives. Once high levels of varroa mite levels are detected, treatment of the hives began immediately. It takes 3 weeks to treat with formic acid pads, and with the weather getting cooler the formic acid vapors will not be as effective as they were in early September.

.
.

.

.

.

.

.

.

.

.

Above: Robbing was so bad this year that I had to install weather stripping between the feeders and the cover to prevent bees from stealing the sugar syrup.

Our winter preparations in October and the first two weeks of November include the following.

1: Colonies are inspected for health. Is the colony strong? Is the colony health? Is there an adequate number of bees to insure the colonies survival through the winter months. Have the bees produced enough comb to store food. Sometimes the combs of bees need to be rearranged so that all the drawn comb and honey stores are located in the upper brood chamber. Empty frames and un-drawn frames of foundation are moved to the lower brood chamber. Since the bees will over-winter in the top box, this should be the location of most of their stores.


2: The hives are inspected for adequate winter stores of pollen and honey. If there is less than 50 lbs of honey in the colony the hives will be fed with a 2:1 ration of sugar syrup. Two parts sugar to one part water. All our colonies are fed sugar syrup and pollen substitute to insure they have more than enough supplies for winter.

Robbing has been a big problem this year. One drop of syrup outside the hive causes thousands of bees to go searching for the syrup. Once this starts hives will attempt to rob other hives of their winter stores. The battle is amazing to watch, but it is not good for the bees. Because of this problem we have installed entrance reducers on all the hives to help them protected themselves against robbing.

3: Mouse guards and entrance reducers are installed on all the hives to keep mice from building nests in the dry cozy hives.

.
.

.

.

.

.

.

.

.

.

Above: Formic acid pads installed over a colony in order to reduce the varroa mites.

4: All colonies are evaluated for varroa mites. If varroa mites are found in large numbers the colonies are treated for varroa and trachea mites using formic acid applications.

5: Ventilation will be provided above the colonies to allow moisture out of the hive. By placing two square toothpicks under the back side of the inner cover, a ventilation space is created. This ventilation will keep moisture from building up on the underside of the cover which would drip on the colony. The cold will not harm a healthy cluster of bees, but cold damp conditions will. I also install a layer of newspaper above the ventilation space. This newspaper will absorb any moisture that may collect, keeping it from effecting the colony.

.
.

.

.

.

.

.

.

.

.

.

Above: Entrance reducers and mouse guards are installed on the hives to prevent the entrance of mice. The mice love to spend the winter in the dry hives. Once inside the mice will destroy the comb to make room for it's nest. You can see the bees bringing in the fall pollen.

6: Review this past seasons beekeeping notes. Identify what went wrong and why. Correct these deficiencies.

Learn by your mistakes!

Spring

Spring
Peach Pollen

Spring Pollen

Spring Pollen

Queen Cell

Queen Cell
Well Fed Queen Cell

Marked Queen

Marked Queen
Queen produced from my second graft attempt